How to Use a Screw Jack?
Struggling to lift heavy loads safely? A sudden failure can be catastrophic. Discover the incredible control and safety a simple screw jack offers you.
To use a screw jack, place it on a firm, level surface directly under the load's certified lift point. Insert the handle and turn it clockwise to slowly raise the load. Always watch for stability and turn counter-clockwise to lower. Never exceed the jack's rated capacity.
When I first started in a mold factory, I saw a screw jack as just another tool. But over the years, I've come to see it as a teacher. Using one is like having a direct conversation with the load you are lifting. You feel the resistance in the handle, the bite of the threads, and the immense power you control with simple motion. It forces you to slow down and be completely present. This slow, deliberate pace is its greatest strength, giving you time to observe and ensure everything is perfect. The screw jack taught me to find power not in speed, but in focus and deliberation. It’s a lesson that goes far beyond lifting heavy things.
How Does a Screw Jack Work?
Confused by how this simple tool lifts thousands of pounds? It seems like magic, but relying on misunderstood tools is risky. Learn the simple mechanics that create immense power.
A screw jack works by converting rotational motion into linear motion. When you turn the handle, you rotate a main screw. This screw moves up or down through a mating nut inside the jack's housing. This action provides a massive mechanical advantage, lifting or lowering the load.

Let's dive deeper into how this process creates so much force. It’s a beautiful example of basic physics at work. The entire system is designed to turn a small effort from you into a massive lifting force. I love this because it's honest and direct. There are no complex hydraulics or electronics, just pure mechanics. It teaches you to respect the process. With every turn of the handle, you are part of that process.
Understanding the Core Components
The magic of a screw jack comes from a few key parts working together. Understanding them helps you appreciate the tool more.
| Component | Function | My Observation |
|---|---|---|
| Power Screw | The central threaded rod that bears the load. The thread design is key. | This is where the conversation happens. You feel the load through the threads. |
| Nut | The internal threaded component that the screw turns within. | The nut must be strong and well-lubricated. Friction here tells you a lot. |
| Housing | The body of the jack that holds all parts together and provides a base. | A solid housing means a stable lift. Never use a jack with a cracked body. |
| Handle/Input | The lever or wheel you turn to rotate the screw. | Your effort here is multiplied many times over. Small turns create powerful results. |
This interaction is a lesson in patience. The fine pitch of the threads means you need many turns to lift the load even a small amount. This isn't a flaw; it's a feature. It makes the lift incredibly precise and stable.
How Does a Simple Screw Jack Work?
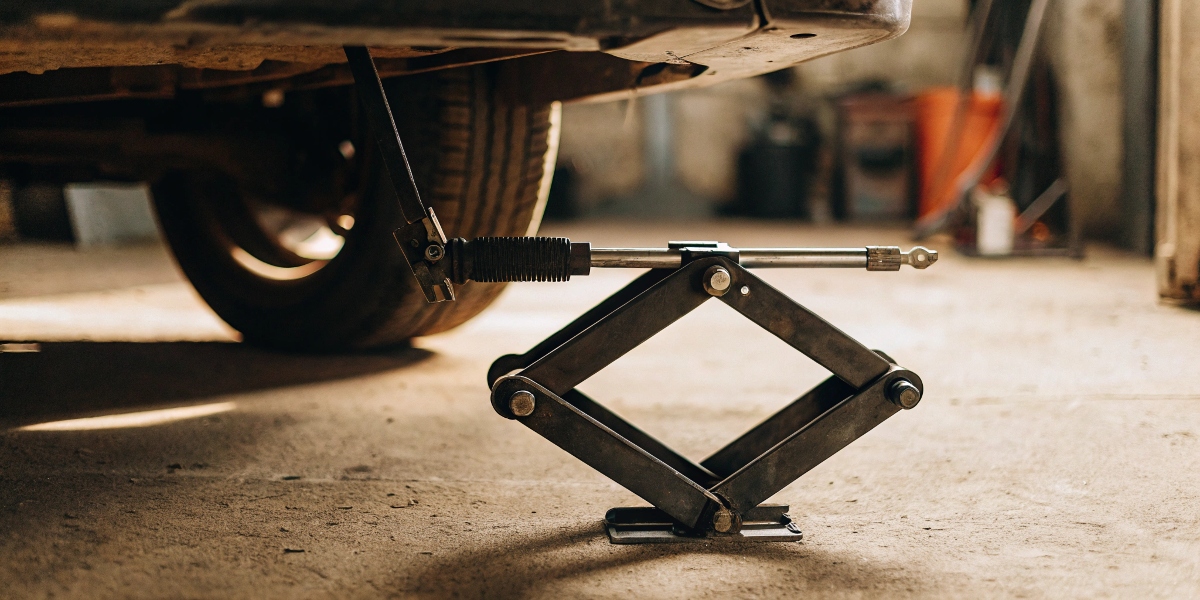
Think all screw jacks are big and industrial? The simplest tools are often the most clever. Understand the genius behind the basic jack you find in a car's trunk.
A simple screw jack, like a scissor jack, uses a single threaded rod. Turning the handle rotates this screw. This rotation pulls the jack's hinged arms closer together, forcing the lifting pad upwards. This simple pivot action translates your turning into a powerful vertical lift.
The first time I had to change a tire on my own, I was just a teenager. I remember being amazed that I could lift a heavy car with such a small tool. It felt empowering. That simple scissor jack didn't just lift the car; it lifted my confidence. It showed me that with the right tool and a bit of knowledge, I could handle big problems myself. This is the beauty of simple mechanical tools. They are accessible and they teach you about the physical world directly.
Common Types of Simple Screw Jacks
Not all simple screw jacks are the same. They are designed for different jobs, but the core principle is always there: slow, controlled power.
| Type | Mechanism | Common Use |
|---|---|---|
| Scissor Jack | A central screw expands or contracts a diamond-shaped linkage. | Vehicle tire changes, light-duty lifting. |
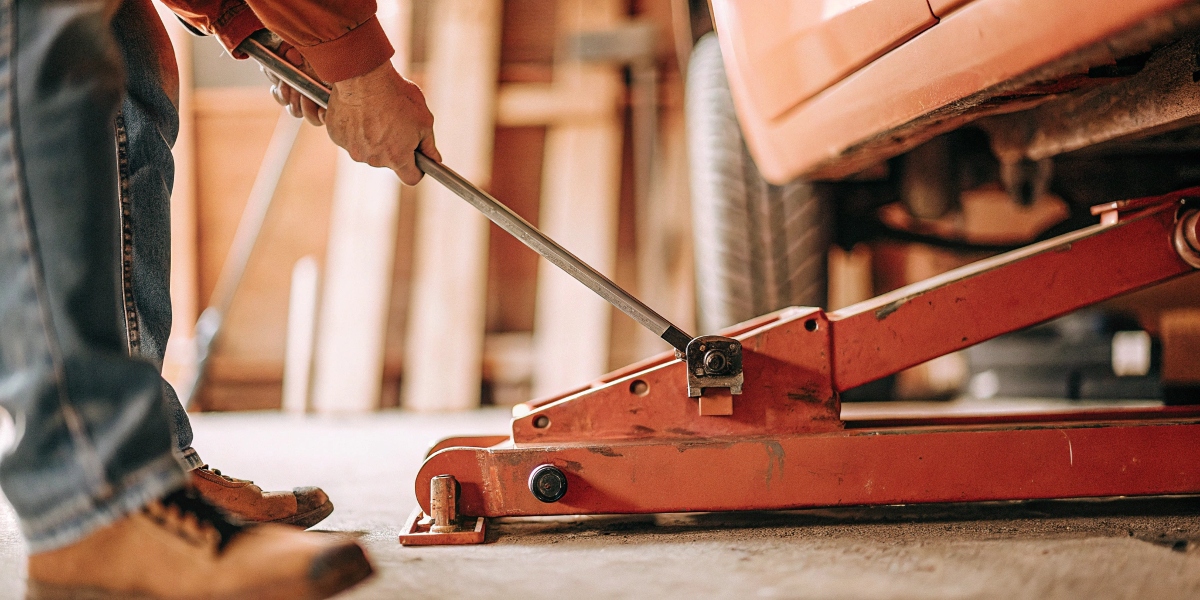
| Bottle Screw Jack | A vertical screw rises out of a solid, cylindrical body. | Workshops, garages, supporting structures. |
| House Jack | A heavy-duty version of a bottle screw jack with a wider base. | Supporting beams and floors during construction or repair. |
When you use a scissor jack, you see the mechanism work. As you turn the handle, the angle of the arms changes, providing the lift. With a bottle screw jack, the screw is hidden, but the feeling is the same. Each turn gives you a small, steady rise. The key is to feel the tool. If the resistance suddenly changes or it feels gritty, stop. The jack is telling you something is wrong. Listen to it. That's the most important lesson it can teach you.
How Safe Are Screw Jacks?
Worried about a jack failing under load? The consequences are severe. Thankfully, screw jacks have a built-in safety feature that many other jacks lack.
Screw jacks are very safe because of their self-locking design. The angle of the screw threads creates high friction. This friction prevents the load from slipping or crashing down on its own, even if you let go of the handle. But safety always depends on proper use.

This self-locking nature is why I trust screw jacks so much. Unlike some hydraulic jacks that can slowly leak or fail suddenly, a screw jack is honest. It either holds or it doesn't, and it gives you plenty of warning. The deliberate pace it requires is a safety feature in itself. It gives you time to look at the base, check the contact point, and notice if anything is shifting. It forces you to be mindful, which is the foundation of all workshop safety. I've told every new employee I've trained: speed is your enemy when lifting. Let the tool set the pace.
Key Safety Considerations
A tool is only as safe as the person using it. Following these rules is not optional; it is essential for your safety.
- Solid Ground: Always place the jack on a firm, flat, and level surface. A soft or angled base is a recipe for disaster. If the ground is soft, use a strong, flat board to distribute the weight.
- Inspect First: Before every use, check the jack. Look for cracked welds, bent parts, or damaged threads. A damaged tool is a dangerous tool.
- Know Your Limit: Never try to lift more than the jack's rated capacity. The maximum load is usually stamped right on the jack. Respect it.
- Center the Load: Place the jack squarely under a manufacturer-approved lifting point. An off-center load can slip and fall.
- Use Jack Stands: This is the most important rule. A jack is for lifting, not for holding. Once the load is raised, always secure it with properly rated jack stands before you work on or under it.
How Should Screw Jacks Be Installed?
Installing a jack incorrectly can ruin your project. A misaligned jack will bind, wear out quickly, and can fail under pressure. Learn the critical steps for a secure setup.
For permanent installation, the screw jack must be mounted on a rigid, flat, and perfectly level surface. Use high-strength bolts to secure the base firmly. The lifting screw must be perfectly aligned with the load's vertical axis to prevent side-loading and ensure smooth operation.

In my trading company, we supply components for complex machinery. I've seen projects delayed and budgets blown because of simple installation mistakes. One client had a system of four screw jacks that kept failing. The issue wasn't the jacks; it was the mounting. The base they built wasn't perfectly flat. The tiny misalignment created huge side forces that wore out the jacks in weeks. This taught me a valuable lesson: preparation and alignment are 90% of the job. Taking extra time to get the installation right saves so much trouble later on.
Installation Checklist
Follow this guide to ensure your screw jack is set up for a long, reliable service life. Rushing this step is a mistake that will cost you.
- Surface Preparation: The mounting surface must be strong enough to handle the total load. It must be clean, flat, and level. Machine the surface if necessary. There is no room for compromise here.
- Mounting the Jack: Use the correct size and grade of fasteners as specified by the manufacturer. Use a torque wrench to tighten them to the proper specification. Do not guess.
- Load Alignment: This is critical. The force of the load must travel straight down the center of the screw. Use precision tools like a plumb bob or a laser level to verify perfect vertical alignment. Check alignment again after a test lift.
- Lubrication: Before the first use, make sure all moving parts are lubricated correctly. Follow the manufacturer's guide for the type of grease and the schedule for re-lubrication.
- Test Run: Before applying the full load, perform a test lift with no load or a partial load. Watch and listen for any signs of binding, scraping, or struggle. The movement should be smooth and consistent.
Conclusion
A screw jack is more than a tool. It is a teacher of patience, control, and respect for force. Master its slow, deliberate process to ensure safe and successful lifting.